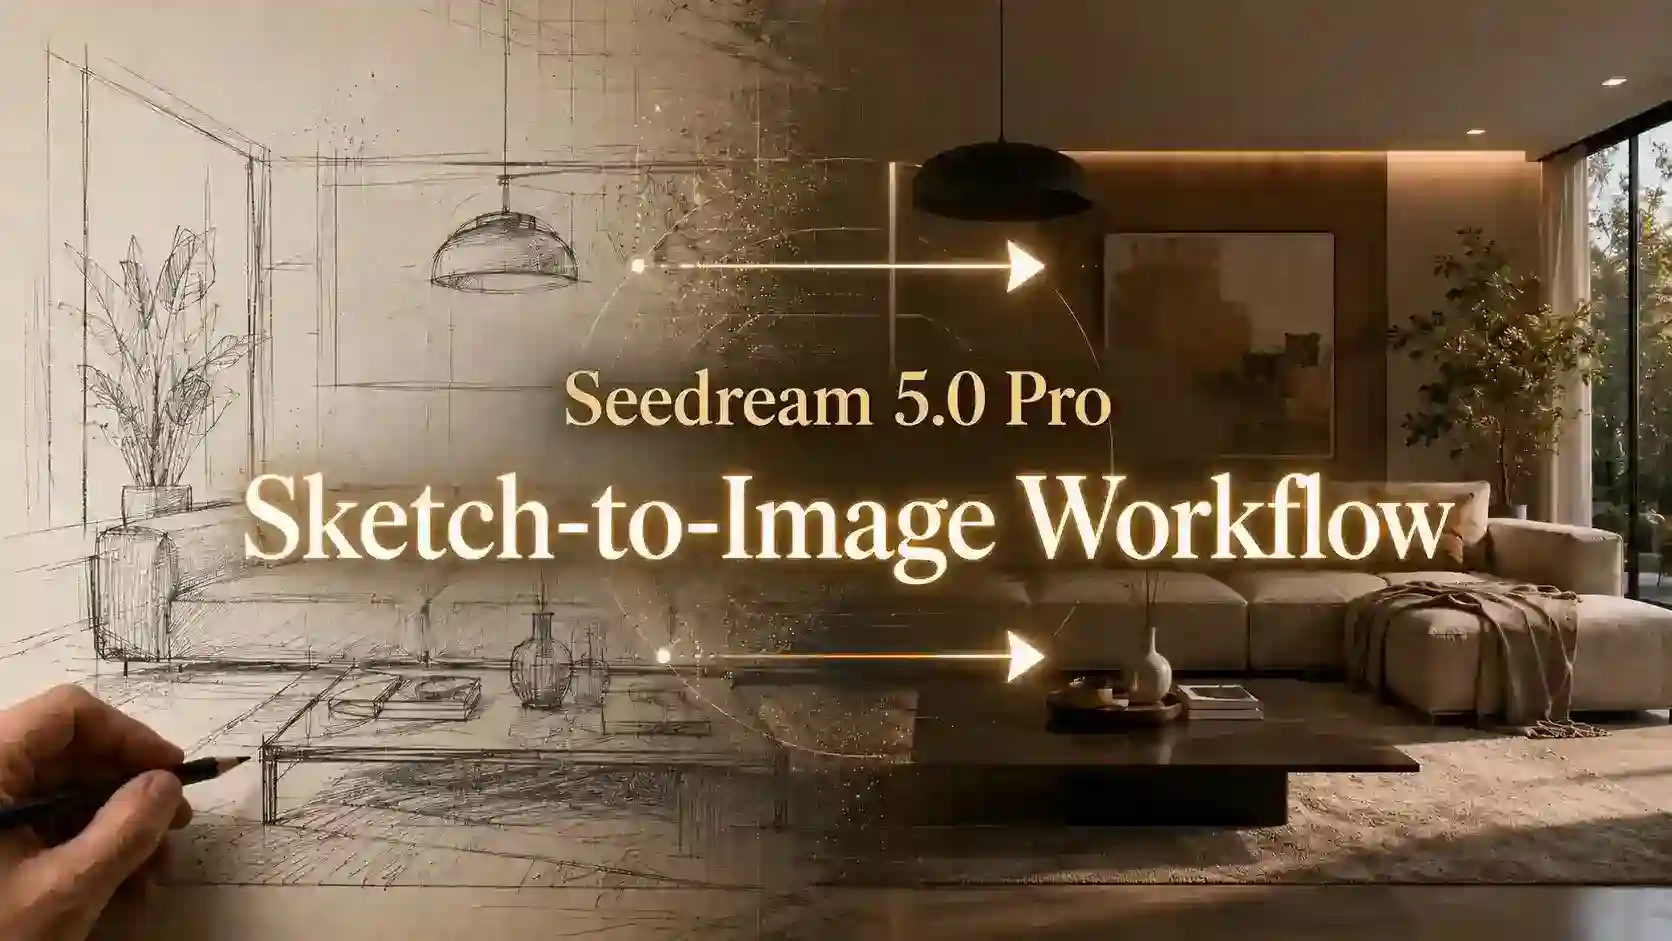
AI image generation can create beautiful visuals, but beautiful is not always useful.
Many creators already have a clear design idea in mind. The challenge is turning that visual idea into a prompt the model can understand.
That is where sketch prompts become valuable.
A sketch prompt combines a rough drawing with a short text instruction.
The sketch gives the AI model a visual structure.
The prompt explains what each part of the sketch should become.
Together, Seedream 5.0 Pro creates a practical sketch-to-image workflow for creators who need more control over their final result.
You do not need polished drawing skills. A simple box, arrow, line, pose outline, or rough scene map can guide the model better than a long paragraph.
Why Are Sketch Prompts Useful for AI Creators?
Sketches turn vague ideas into visible structure.
Text prompts are useful for describing style, mood, subject, and lighting. Image prompts are useful for keeping a reference look. But neither always gives precise control over where things should appear.
Sketch prompts fill that gap.
Workflow Type | Best For | Main Limitation |
Text Prompts | Describing the subject, style, mood, lighting, and overall concept | Difficult to control exact layout, spacing, object position, and body pose |
Image Prompts | Keeping a product shape, character identity, visual style, or brand reference | May preserve the look but change the composition or scene structure |
Sketch Prompts | Guiding layout, pose, object placement, spatial structure, and design hierarchy | Requires a clear sketch and a short explanation of each marked area |
For creators, the benefit is simple: less guessing, more direction.
Instead of writing a longer prompt and hoping the model understands the layout, you can draw the basic structure first. Then the written prompt adds design style, material, lighting, and detail.
When Should You Use Sketch Prompts?
Use text for style. Use sketch for structure.
Sketches are most useful when the layout matters. If your goal is open-ended exploration, a text prompt may be enough. But if you need a specific composition, a sketch can save time.
Input Type | Best For | Main Limitation |
Text Prompt | Style, mood, lighting, subject, atmosphere | Weak control over exact layout, pose, and placement |
Reference Image | Visual identity, product look, character style, brand mood | May keep the look but change the structure |
Rough Sketch | Layout, pose, composition, object position, scene planning | Needs a short explanation of what each shape means |
Text describes the final look. Sketches define the visual plan.
How to Write a Useful Sketch Prompt?
Make the sketch simple enough to read.
A good sketch does not need detail. It needs clarity.
The goal is not to draw the final image. The goal is to show the structure of the design.
✅ A useful sketch can include:
boxes for poster sections
a stick figure for body pose
arrows for movement or placement
circles for objects
rough shapes for furniture
marked areas for local changes
empty zones for text or product focus
💡 The best sketch prompts usually explain three things:
What the sketch is for.
What each major area means.
What the final design should look like.
This kind of instruction gives the model both visual direction and design intent.
More Seedream 5.0 Pro Prompt Guide
How to Improve Poster Design with Sketch Prompt?
A simple sketch can plan the poster.
Poster design is one of the strongest use cases for rough sketches.
A good poster is not just an image. It needs structure.
The headline must have enough space.
The main subject should be easy to see.
Supporting text should not fight with the visual.
The whole layout should guide the viewer’s eye.
A text-only prompt may create a nice poster, but it may not follow your intended layout. A sketch can solve this by giving the AI model a basic wireframe.
Poster Layout Prompt Example
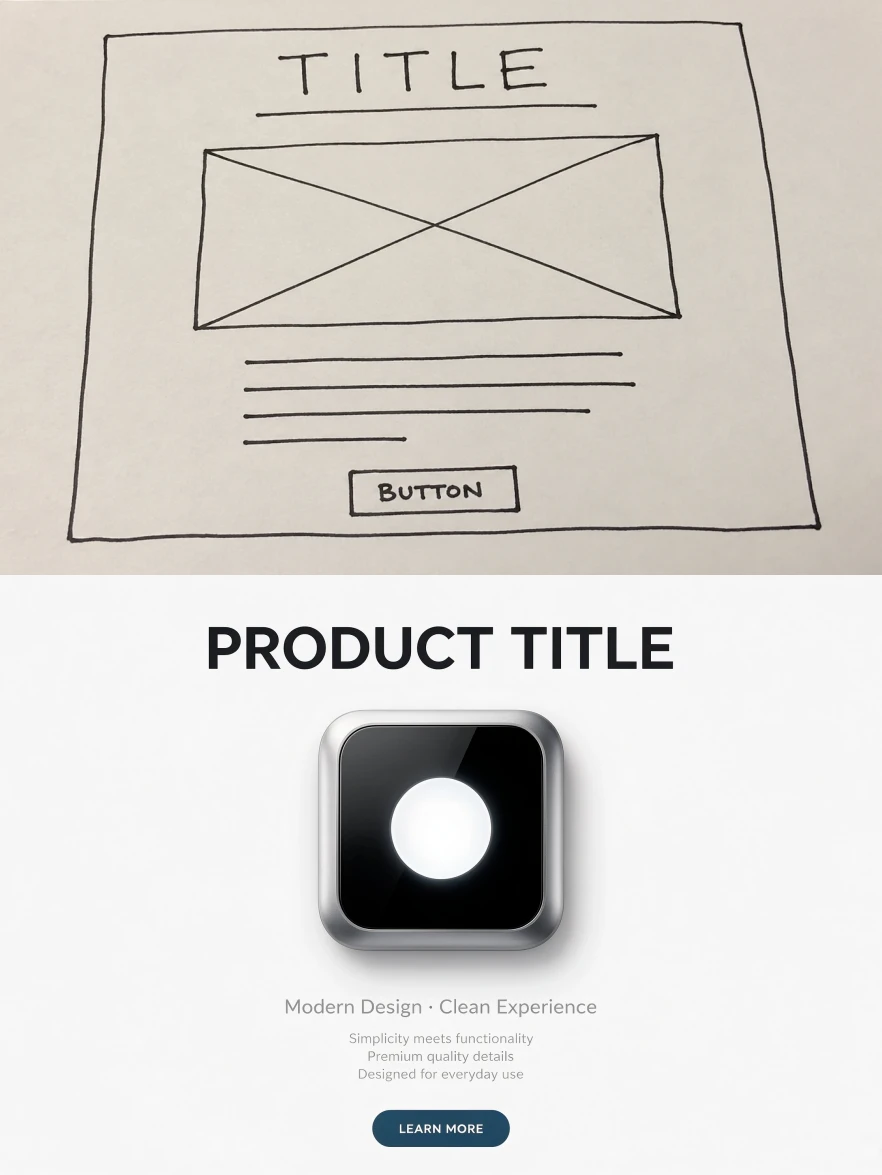
Use the sketch as a poster layout guide.
The top section is the headline area.
The center block is the main product area.
The bottom section is for a short subtitle and product details.
Create a clean modern campaign poster with strong visual hierarchy, soft studio lighting, and balanced negative space.
Keep the layout close to the sketch.
Writing Tips
For stronger AI poster layout results:
Keep the sketch clean
Label each main area in the prompt
Use design terms like visual hierarchy, negative space, and balanced composition
Avoid too many text blocks
This workflow is useful for product launches, social media ads, landing page graphics, event posters, and ecommerce banners.
How to Control Character Pose with Sketch Prompt?
Draw the body direction first. Add style later.
Character images often fail when the pose is too vague.
A rough pose sketch helps by showing the body structure first.
The sketch can guide:
head angle
shoulder direction
arm position
leg placement
body curve
movement direction
overall silhouette
Then the prompt can add clothing, lighting, camera style, and environment.
Character Pose Prompt Example
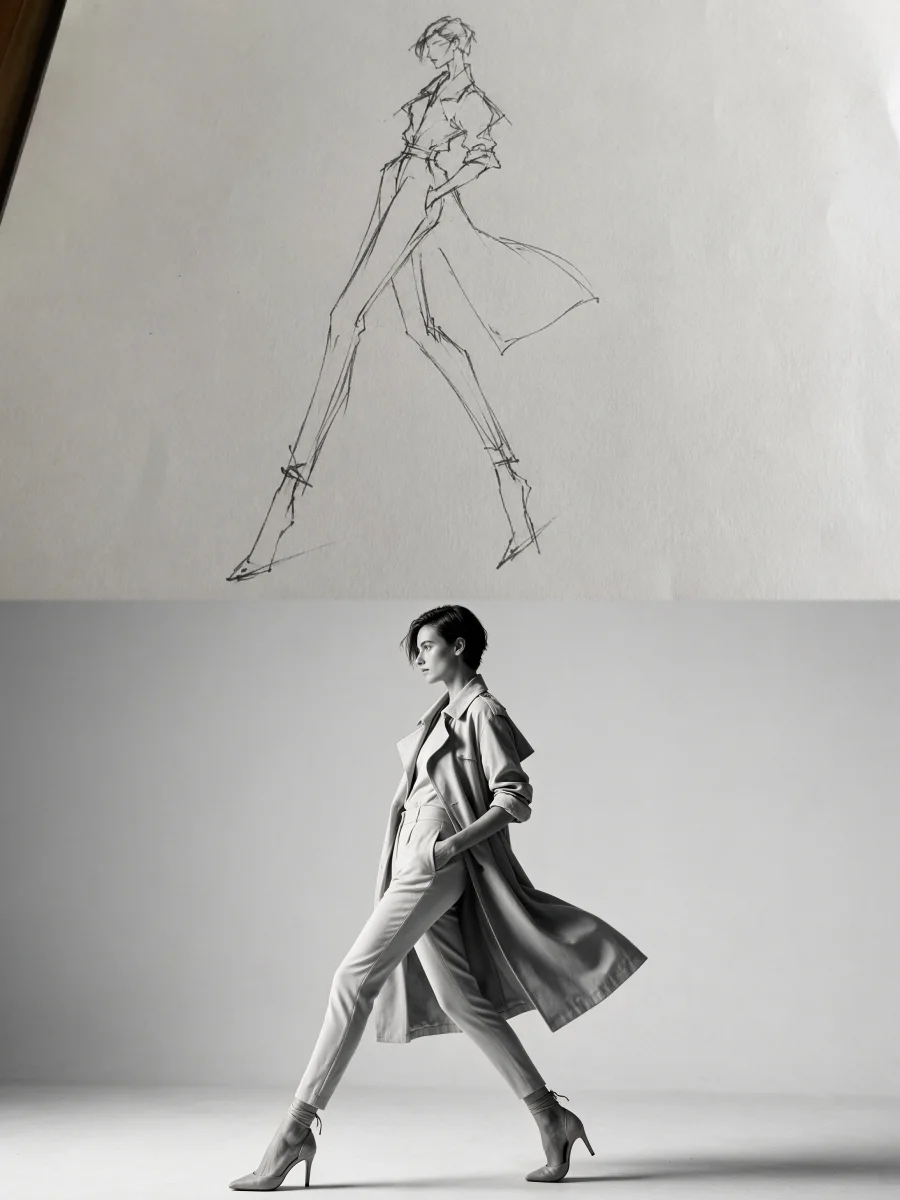
Use this sketch as a pose guide.
Create a fashion editorial image of a person standing in a clean studio environment.
Follow the body angle, arm direction, leg position, and overall silhouette from the sketch.
Add modern clothing, natural lighting, and a polished magazine-style look.
Keep the pose close to the sketch.
Writing Tips
For better character control:
Keep the background simple if pose accuracy is important.
Add camera direction only when needed.
Describe the final style separately.
Include a clear keep rule: keep the pose close to the sketch.
This is useful for AI fashion design, character concept art, social media portraits, campaign visuals, and creative storytelling.
How to Build Scene Layouts with Sketch Prompt?
Sketch the space before filling it with detail.
Scene generation often becomes messy when the model has no clear spatial plan.
A rough scene sketch can show the model how the space should be arranged.
Scene Layout Prompt Example
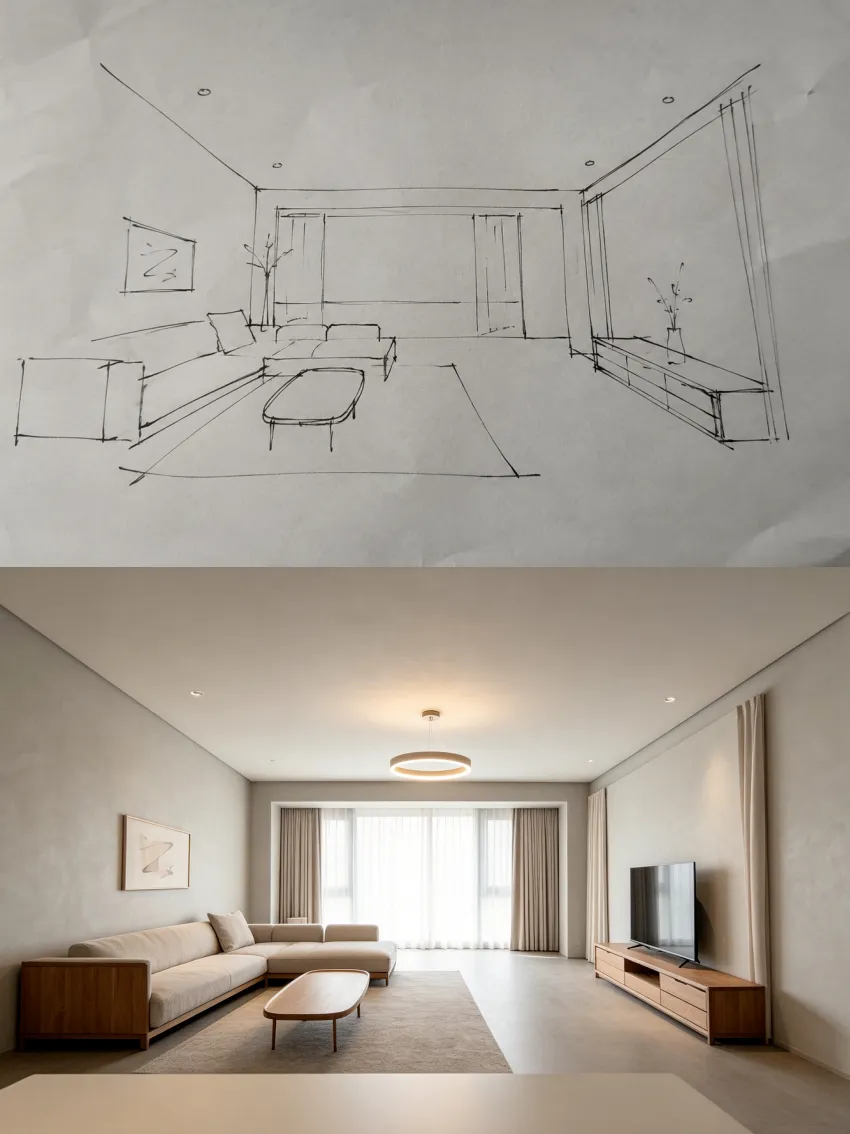
Use the sketch as a scene layout guide.
Create a realistic interior photography scene.
Keep the foreground table, middle subject, and background wall in the same positions as the sketch.
Add simple decor, natural lighting, realistic shadows, and clean depth.
Preserve the perspective relationship shown in the sketch.
Writing Tips
For stronger AI scene layout results:
Divide the scene into foreground, middle ground, and background.
Define the main focal point.
Mention perspective and camera angle.
Tell the model to preserve spatial relationships.
This is valuable for interior concepts, room mockups, product scenes, lifestyle visuals, and brand storytelling.
How to Guide Multiple Edits with Sketch Prompt?
Each mark should have one job.
A sketch can also guide several edits at once.
This kind of multi-area editing is practical for design revision because real projects rarely need only one change.
Multi-Area Edit Prompt Example

Use the marked areas as editing instructions.
Change area A into an orange display cabinet.
Add a glowing light strip around area B.
Remove the plant in area C and naturally complete the background.
Add a small robot at the arrow-marked position.
Keep the overall perspective, material style, lighting, and spatial relationship unchanged.
Writing Tips
For better multi-area results:
Label each region clearly.
Give one task to each area.
Use consistent style language.
Add preservation rules at the end.
This workflow works well for interior mockups, retail displays, product scenes, UI concepts, and visual campaign revisions.
The clearer each mark is, the easier it is for the AI model to follow your direction.
How to Create Photography-Style Images with Sketch Prompt?
A rough composition can become a polished photo.
Sketches are also useful for AI photography concepts, especially when you already know the composition.
A rough still life sketch can define:
main object shape
object placement
table surface
background area
prop locations
lighting direction
Then the model can complete the image with realistic materials, natural shadows, and commercial photography polish.
Still Life Photography Prompt Example
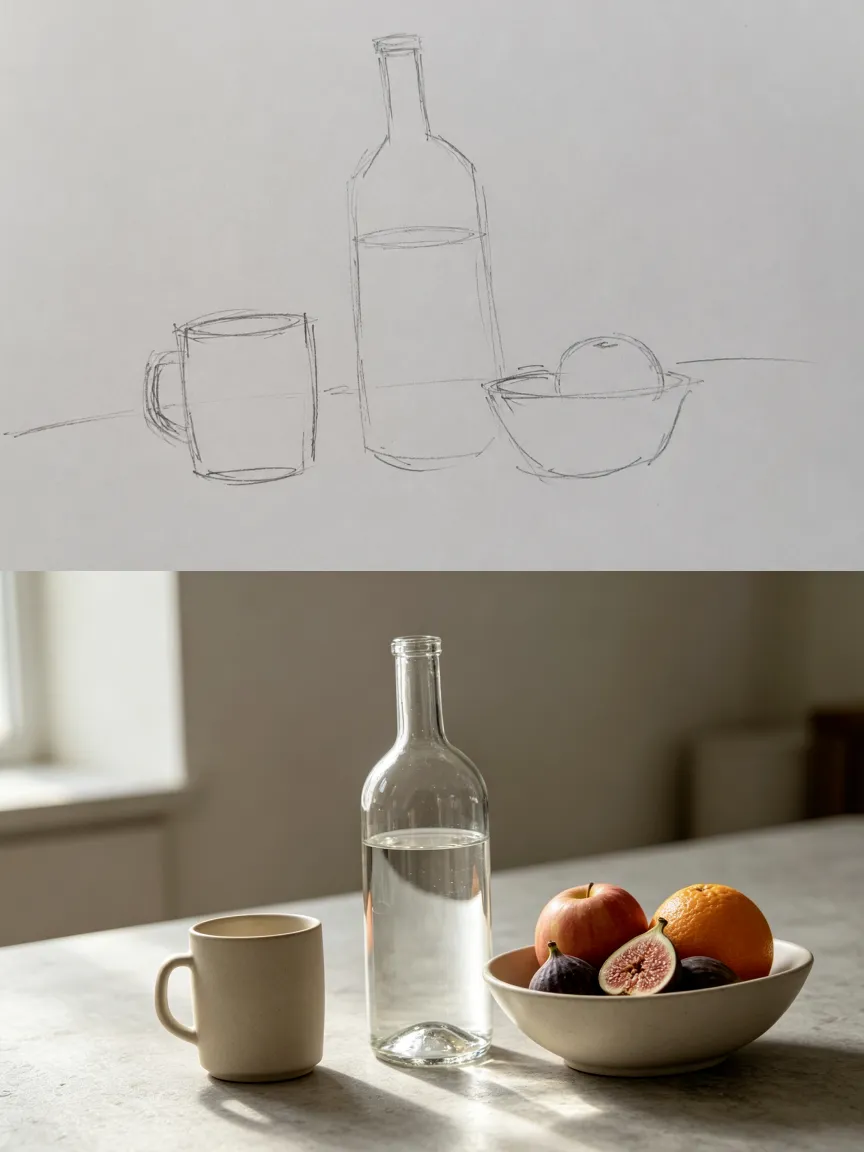
Use this hand-drawn sketch as a still life photography guide.
Keep the main object shape, placement, background area, and text position from the sketch.
Complete the scene with food, tableware, tabletop texture, and natural lighting.
Use a clean commercial photography style with soft shadows and realistic details.
Writing Tips
For better AI product photography or still life results:
Start with object placement.
Mention surface and background.
Add lighting direction.
Use commercial photography terms, soft shadows, natural light, and realistic texture.
This is not just “draw to image.” It is a practical way to turn a rough visual plan into a polished commercial concept.
Common Mistakes You Should Avoid
A sketch helps, but clarity still matters.
Sketch-guided generation is powerful, but it can fail if the input is unclear.
Mistake 1: No explanation
Bad Prompt:
Make this sketch better.
✅ Better Prompt:
Use this sketch as a product poster layout. The top section is for the headline, the center shape is the product, and the bottom section is supporting text.
Mistake 2: Too many tiny details
A sketch should guide the main structure. Do not overload it with every small object.
✅ Better:
one sketch for layout;
one sketch for pose;
one sketch for room structure;
one sketch for product placement.
Mistake 3: No preservation rule
Always tell the model what should stay stable.
✅ Example:
Keep the layout, perspective, main subject position, and lighting direction unchanged.
Mistake 4: Too many styles
Avoid mixing too many visual directions in one prompt.
✅ Choose one main style:
modern, editorial, luxury, realistic, minimal, cinematic, or playful.
Mistake 5: Depending only on the sketch
The sketch gives structure. The prompt gives meaning.
✅ A better workflow is:
Sketch = visual structure
Prompt = creative direction
AI = polished output
When words feel limited, draw the structure.
Rough sketches make AI design more controllable. They help creators guide layout, pose, space, object placement, and commercial composition without writing overly long prompts.
The sketch does not need to be beautiful. It only needs to be clear.
Start with a simple drawing.
Explain what each area means.
Add style, lighting, material, and keep rules.
Then use Seedream 5.0 Pro to turn a rough sketch into a finished AI design.
Try Seedance 5.0 Pro - Free to Start 👉
Create your sketch-to-image project and experience a more visual way to control AI design.